This guide explains how to set up Bitcoin payments on your website using Electrum. We’ll use SSL-signed payment requests, following the BIP-70 standard. This documentation is current for Electrum 4.0 and later.
Before you start, make sure you have:
- A valid SSL certificate (CA-signed, such as the free LetsEncrypt).
- The development version of Electrum installed.
Remember to run the submodule update command during installation.
Set Up Your SSL Certificate in Electrum
To enable secure connections, you need to add your SSL certificate to Electrum. Use these commands in your terminal:
electrum -o setconfig ssl_keyfile /path/to/ssl/privkey.pem
electrum -o setconfig ssl_certfile /path/to/ssl/fullchain.pem
For more detailed instructions on adding SSL to Electrum, check the Configuring SSL for Electrum.
Creating and Using Your Merchant Wallet
Set up a secure wallet for your business transactions. This process helps protect your cryptocurrency even if your merchant server is compromised.
- Create a New Wallet
On a secure computer, create a new wallet:
electrum create
It’s best to use a separate wallet for your business, not your personal one.
- Export the Master Public Key
Still on your secure computer, export the Master Public Key (xpub):
electrum getmpk -w .electrum/wallets/your-wallet
- Set Up the Merchant Server
On your server machine, restore the wallet using the exported Master Public Key:
electrum restore xpub...............................................
Replace xpub... with your actual Master Public Key
- Configure Server Settings.
electrum -o setconfig payserver_address yourdomain.com:80
Replace yourdomain.com with your actual domain.
Starting the Electrum Daemon
After setting up your read-only wallet, you need to run Electrum as a background service. Here’s how:
- Start the Daemon
Run this command to start Electrum as a daemon:
electrum daemon -d
This launches Electrum in daemon mode, allowing it to run in the background.
- Load Your Wallet
Next, load your wallet into the running daemon:
electrum load_wallet
This command makes your wallet active and ready for use.
Stopping the Daemon
If you need to stop the Electrum daemon at any point, use this command:
electrum stop
This will safely shut down the Electrum daemon.
Create a signed payment request
electrum add_request 0.5 -m "test"
{
 "URI": "bitcoin:bc1q3hr4xnta7s4jgeymjhs498ygqa53qkjxqhlx3z?amount=0.5&message=test&time=1589115653&exp=3600",
 "address": "bc1q3hr4xnta7s4jgeymjhs498ygqa53qkjxqhlx3z",
 "amount": 50000000,
 "amount_BTC": "0.5",
 "bip70_url": "https://yourdomain.com:80/bip70/bc1qyr5xx5jkue3k72sldm5xa0taqs3n2achupymz8.bip70",
 "exp": 3600,
 "id": "63822b69013",
 "memo": "test",
 "status": 0,
 "status_str": "Expires in about 1 hour",
 "time": 1589115653,
 "type": 0,
 "view_url": "https://yourdomain.com:80/r/pay?id=bc1q3hr4xnta7s4jgeymjhs498ygqa53qkjxqhlx3z"
}
Here’s a breakdown of the key information:
URI: A Bitcoin URI that includes the amount, message, timestamp, and expiration.address: The Bitcoin address for the payment.amount: The requested amount in satoshis.amount_BTC: The requested amount in BTC.bip70_url: The URL of the signed BIP70 request.view_url: The URL of a webpage displaying the request.
The command output includes two important URLs:
bip70_url: This is the URL of the signed BIP70 request.view_url: This is the URL of a webpage that displays the request details.
To view your current list of requests, use the list_requests command.
To remove all requests from the list, use the clear_requests command.
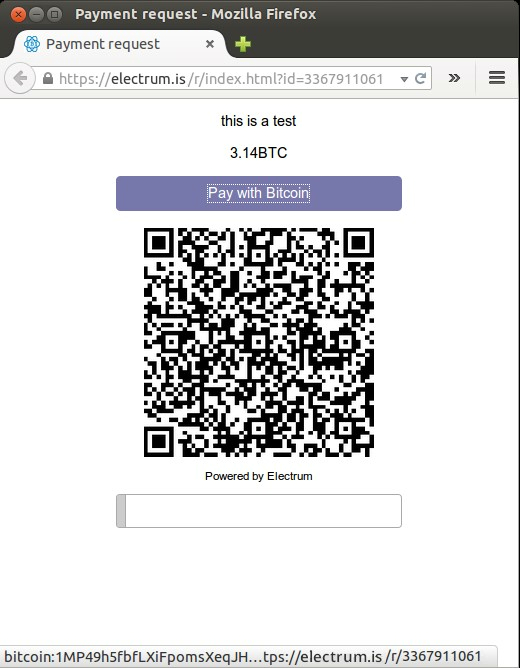
Open the payment request page in your browser
After creating a payment request, you can view it in a web browser.

Here’s how to use the payment request page:
- Open the
view_urlfrom the payment request output in your web browser. - The page will display the payment request details, including:
- A Bitcoin URI that can be opened with a wallet.
- A QR code that can be scanned for payment.
- The remaining time until the request expires.
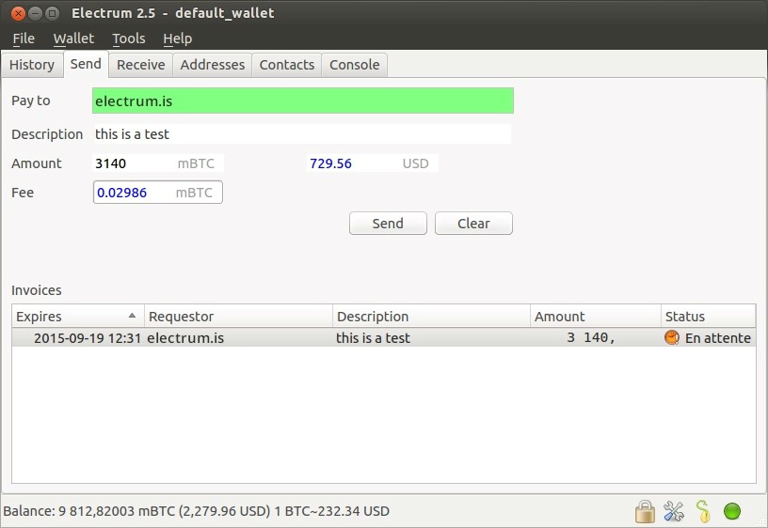
- To make a payment:
- Use a Bitcoin wallet to open the provided Bitcoin URI.
- Scan the QR code with a mobile wallet.
- The page uses websockets to update in real-time. When the payment is received, the page will automatically refresh to show the updated status.

The actual appearance of the page may vary, but it will contain the essential information needed to complete the payment.
Important: Always verify the payment details before sending any funds.
Lightning Payments
Setting Up Lightning
To use Lightning, you need to set up Lightning keys in your wallet. Follow these steps:
- Stop the Electrum daemon:
electrum stop - Initialize Lightning keys:
electrum -o init_lightning - Restart the daemon:
electrum daemon -d
You can add Lightning keys to a watching-only wallet. This wallet won’t be able to spend coins on-chain, but it can perform Lightning transactions.
Opening a Channel
After setting up Lightning, you need to open a channel:
electrum open_channel <node_id> <amount>
To check if the channel is ready for use:
electrum list_channels
Note that your new channel won’t have inbound capacity at first, so you can’t receive payments immediately. If you need to receive right away, consider doing a submarine swap of your channel funds.
Creating a Lightning Payment Request
To create a Lightning payment request:
electrum add_lightning_request 0.0001 -m "test"
This command creates a request for 0.0001 BTC with the message “test”.
